Creating a Basic REST API Using Spring Boot: Part 4
Written on
Chapter 1: Introduction to REST Controllers
This tutorial continues from the previous installments. If you haven't yet, please begin with the initial parts of the series.
In this section, we will introduce the fundamental component of a REST API, the controller, which is crucial for managing our CRUD operations and handling API requests efficiently.
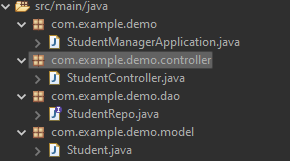
To kick things off, create a new package within com/example/demo and label it “controller”. In this package, we will define a class called "StudentController". Once completed, your directory structure should resemble the following:

Chapter 2: Setting Up the Controller
To transform this class into a REST API, we will annotate it with @RestController. For more details on the RestController annotation, refer to this link. In essence, the RestController facilitates the creation of RESTful web services with minimal complexity.
Chapter 3: Implementing GET Requests
In this segment, we’ll reverse the usual process. I will first demonstrate a complete GET request and then dissect its components.
Before initiating any requests, it’s essential to import our Repository to access its useful features.

The @Autowired annotation automatically creates an instance for us upon application startup, implementing the concept of dependency injection. For more information on dependency injection, visit this link.
Next, we will define our GET request:
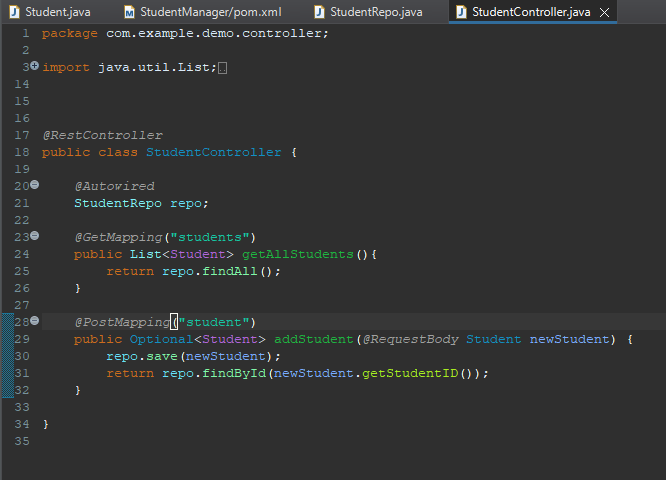
@GetMapping("students")
public List<Student> getAllStudents() {
return repo.findAll();
}
Breaking this down:
- The @GetMapping annotation indicates that this method retrieves information from our database. The second part of this annotation specifies the API endpoint, such as “localhost:8080/students”.
- The method, named getAllStudents, returns a list of students.
- Finally, repo.findAll() fetches all student records.
If you execute this and make a GET request using Postman, you may receive an empty list. To resolve this, we will proceed to create a POST request.
Chapter 4: Creating POST Requests
The POST request has some differences compared to the GET request, though similarities are evident.
@PostMapping("student")
public Optional<Student> addStudent(@RequestBody Student newStudent) {
repo.save(newStudent);
return repo.findById(newStudent.getStudentID());
}
Here’s how this works:
- The @PostMapping annotation indicates that this method handles POST requests. We’ve named the endpoint "student", but feel free to customize it.
- The method addStudent returns an Optional type, which is useful for handling scenarios where a student object may or may not be found.
- The @RequestBody annotation signifies that the data is sent within the body of the HTTP request, converting it into a Java Object or JSON. For additional insights, check this link.
- The method body contains repo.save, which stores the new student in the database, and we use repo.findById to return the newly saved student by its unique ID.
By the end of this section, your controller should look as follows:

Chapter 5: Testing Our Implementation
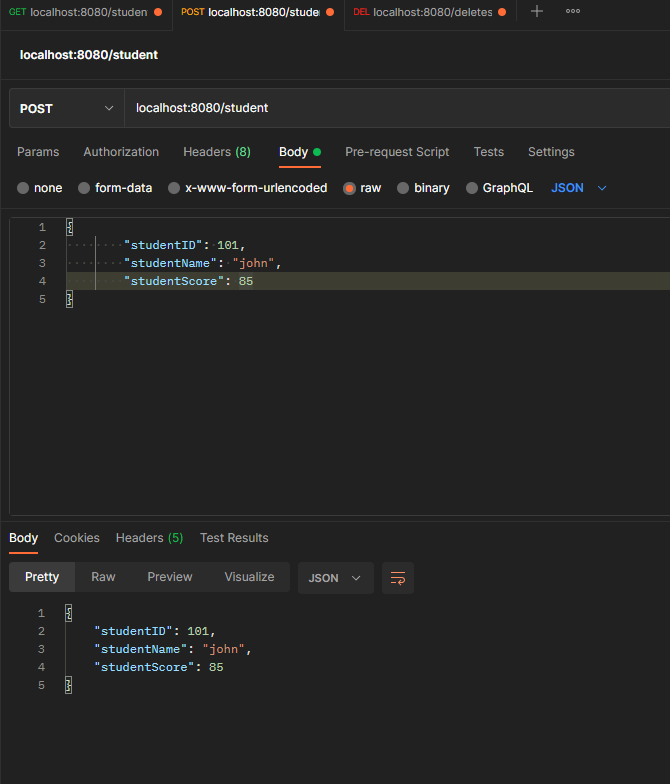
Let’s see these new features in action using Postman. Set your request to POST, and input the new student details in the body using JSON format. Upon sending the request, you should receive a response like this:

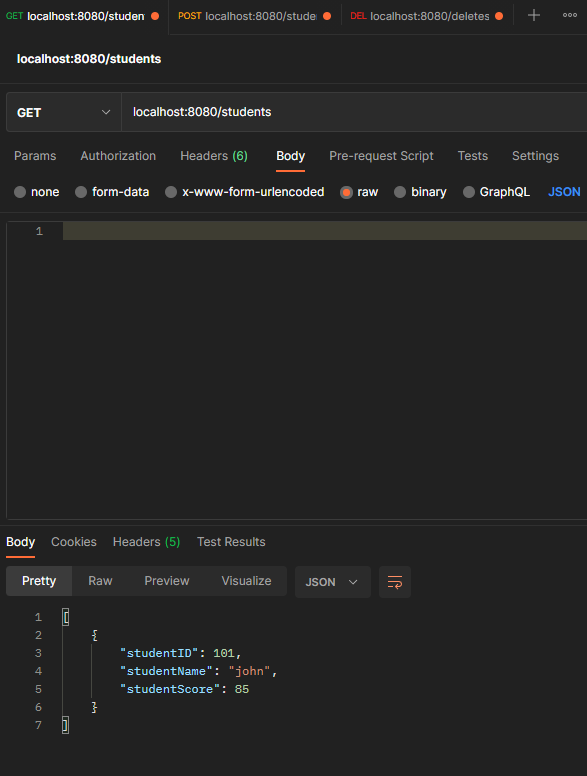
To verify that the student has been added to the database, make a GET request:

Conclusion
This concludes our guide on setting up a REST API. There are numerous aspects not covered in this tutorial, so I encourage you to explore further. Mastering REST API creation is an invaluable skill that will benefit you throughout your programming career. If you seek additional guidance, consider researching how to implement DELETE and PUT requests in the controller.
I will provide a link to the code repository in the resources section of this guide; feel free to check it out and experiment. Should you have any questions, don't hesitate to comment, and I’ll respond as quickly as possible.
Wishing you a great day ahead!
Resources
- Link to the GitHub repository for this code
- Information on Rest Controllers
- Spring Dependency Injection
- Spring Request Body Annotation